Showing posts with label house things. Show all posts

Monday, March 29, 2010

2010 to-do list: the duvet issue

ohmygosh, my sister is getting married!!!

okay, whew. now that i have that out of the way and i can breathe again (i am SO excited!!), here's my latest project: snaps on the guest room duvet. i can check something else off my 2010 to-do list. it didn't end up exactly how i had envision it, but i like this better, i think.

the goal was to sew ties into the corners of the guest room duvet and then buttonholes into the comforter itself, so the ties could be threaded through the buttonholes and the comforter wouldn't shift around in the duvet. this is one of my biggest pet peeves and i picked up that little trick from martha stewart years ago and filed it away in my mind, and ever since i upcycled my old twin comforter this has been on my list of things to do. but then, my mom went and bought herself a snap press and didn't love it as much as she thought she would. it's on extended loan at my house right now and very handy. i mean, who doesn't love a snap?

first, i set the male end of the snap onto a piece of sturdy grosgrain ribbon and then snipped it so i had a little snapped tab. then i sewed it into the duvet.

(blogger is not letting me upload pictures, or else you could see what i did. i know, snaps are SO EXCITING, you're all dying for photos. take it up with google.)

then i set the female end of the snap directly onto the comforter itself. the comforter gets snapped to the little tabs, and stays in place. the tabs give the comforter a little bit of movement while still keeping it in place. there are four tabs in the guest room duvet (two at the top and two at the sides near the top). i love this so much, i ended up putting tabs into two of the master bedroom duvets as well.

in other news, i've been on a spring cleaning/organization tear. i built a workbench in the garage (more on that later) and hung shelves in my laundry room and in the guest room closet. i took an entire trunkful of crap stuff to goodwill and made $100 selling some other stuff on craigslist. my current project is fabric organization: i discovered when cleaning out that (GASP) i have WAYYYY too much fabric. i never thought those words would ever cross my lips, but there it is. so sometime this week we shall see how much fabric i can part with, and it'll go up on the etsy shop, and maybe i'll make a little more money. fingers crossed.

now, go congratulate my sister!

Monday, March 8, 2010

magazine rack

every year around this time, all the fantasy baseball magazines come out, and brian has to buy them all. every single one. most of them live in the magazine basket in the downstairs bathroom, but one or two or four inevitably migrate upstairs into the water closet in our master bath. generally they live on the floor until the following year (because you can't discard them once the season is over, because... um... well, i'm not really sure why) although sometimes they manage to hop up onto the back of the toilet and compete for space with the reed diffuser, which generally loses and finds its way up onto the windowsill.

i hate this migration. with a passion. it is so messy and cluttery and annoying and everything is always in my way. besides, i'm not really sure what we need with FOURTEEN baseball magazines, but he would probably same the same thing about my closetful of fabric. which everyone knows is a necessity because what if the power went out during a snowstorm, HOW WOULD WE STAY WARM.

but i digress. here is the point of all this ranting and rambling:


yes folks, i built that! this weekend! i had been looking for months for a small, wall-mounted, wooden magazine rack, but everything i found was either too office-y or in the ballpark of $39 and up. for a magazine rack. to hold magazines. glossy, bound, pieces of paper with pictures and writing that only cost $4.95.

this cost me $4. four dollars.

let me repeat that: FOUR DOLLARS. AMERICAN.

i built it out of primed mdf trim that i picked up at home depot, and a dowel that i cut to size. the trim is sold by the linear foot for something like 69c/lf. i don't know, that might be expensive when it comes to baseboards for an entire house, but since i only needed 3-4 feet, it was great for me. i slipped a piece of quarter-round into the bottom so the magazines wouldn't slide out the front, and the dowel pieces are slipped into little holes i drilled into the sides. a little glue and some tiny nails from my staple/nail gun, and some spackle to fill in the cracks, and i was ready to paint it. i would have preferred wood stained to match our cabinetry, but i don't have the tools or skills to make anything pretty enough to be stained. the paint is touch-up paint for our trim, so it goes with the house perfectly.

i am so ridiculously proud of this. i want to sit in my bathroom forever just to look at it.

this is my parents' legacy to me, and hopefully to hannah also: if you can't find what you want, then just build it, sew it, scrap it, knit it, craft it, cook it, bake it, make it.

Thursday, February 18, 2010

my very own farm box!

one of the things on my 2010 to-do list was fill the planter box with dirt and plant a garden. well, it's finally happened! okay, the garden itself is not planted, but everything is ready to go for it and it WILL be planted in a couple weeks.

i decided to do square foot gardening because i had read that the garden stays virtually weed-free and that you can get a LOT of produce out of a small space. i did my garden on the cheap, though. you can spend a lot of money through that website, but i am not a devoted follower so i didn't. i filled the planter box with a mixture of compost, a few bags of garden soil picked up on the cheap from our local nursery, and some free sandy dirt that i found on craigslist.

then it was time to make my squares. according to mel, the grid is what makes square foot gardening work. i think it helps to keep you visually and mentally organized. i used household string and a staple gun to make my grid. i plan to plant two squares of swiss chard, two squares of bell peppers, two squares of zucchini, and two squares of indeterminate tomatoes across the back. in the front squares, i have planned a square of regular parsley, a square of italian parsley, two squares of basil, a square of thyme, a square of chives, and two squares of carrots.


i started my plants from seed. i bought a humidity dome (cheap) and some peat pellets. carrots, zucchini, and peppers will be sown directly into the soil, but everything else was started in here. i also started some roma tomatoes, to go in a large pot on our patio. romas make a bush instead of a vine, so they will be nicer in the pot than in the bed crowding out other plants, and they will look pretty when they are caged.

i also needed a trellis for the peppers, tomatoes, and zucchini. i was going to buy some, but my father suggested building one would be cheaper. for about $6 in lumber, this is what i built.


i used 2x2 furring strips for the main vertical pieces, and 1x2 furring strips for the cross-brace and side braces. then i cut small notches on the outside every 12 inches, and wrapped garden wire around the vertical pieces, in the notches. the trellis does not go all the way across the box because i only need it for six squares (two each of tomatoes, peppers, and zucchini) and also because it would block the guest bedroom window.

see those little rectangles in the front of my box? those are my labels! originally i wanted to use large popsicle sticks or wooden tongue depressors, but the craft store was out of them. these are 2x3-inch wooden rectangles that i found in the wooden craft aisle of the craft store. they were 29c each and i only needed eight (seven for here and one for my pot of romas). i wrote the names of the plants on them with a permanent marker and then tacked them on with the staple gun. i think they will be easy to pry off next year. the one for the romas i will glue to a skewer or something so it can be stuck in the dirt of the pot.


in a couple of weeks my seedlings will be ready to be hardened off and planted in the box, and then i will have to start the long impatient wait until i can harvest. i have been learning a lot about gardening, more than i ever thought was possible!

Wednesday, February 17, 2010

2010 to-do list: in progress

i have been a bad blogger lately. i'm sorry. often i feel that there is not much interesting going on around here. we have been getting our farm boxes, and i love them still. and i am trying to make some very positive changes in my life.

one of the biggest changes i am trying to make is to be more disciplined. since that is kind of a vague goal, i defined it somewhat in my 2010 to-do list (aka new year's resolutions). specifically, i said i wanted to create and maintain a household management schedule and plan meals weekly and keep our grocery bill down. (i know "down" sounds kind of nebulous too, but trust me, there is a dollar amount attached to it as well.) so far i have been succeeding at both though i am hesitant to cross them off the list as "done" just yet. it's still early in the year.

my household management schedule was pretty simple. i am basically an overgrown five-year-old, and i like getting gold stars when i do things. so i made myself a chore chart and broke it down by day. this is what my week looks like:

monday: indoor chores
- wash sheets
- sweep tile
- mop tile
- vacuum
- clean toilets
- clean bathroom sinks
- clean upstairs shower (the others get used very rarely)
- dust
- bring in garbage cans
- water plants

tuesday: outdoor chores
- mow lawns
- trim roses
- pull weeds
- edge lawns
- sweep front porch
- sweep garage
- spa chemicals

wednesday:
- laundry
- iron brian's work shirts
- menu-planning/grocery list
- pick up csa box

thursday:
- grocery shopping

it became a lot more manageable when i realized that "running" the house is really just a lot of little tiny chores. cleaning the house is this huge big thing and where do you even start, but how long does scrubbing a toilet really take. i pull a bucketful of weeds each week, and they stay under control and i don't break my back. this way i also have three days "off" at the end of the week, when my chores are all done, though lately i've been doing my grocery shopping on wednesdays while we're out getting the csa box, so i've been getting four off days, which came in handy when the lawn was too wet to mow last tuesday.

getting the csa box is also forcing me to be more disciplined. we are eating healthier and i am forced to plan meals and shop with a grocery list, which is keeping our grocery bill down. it's still not under my target budget, but i'm working on that. i feel guilty letting all that good food go to waste (although we have gotten butternut squash four weeks in a row and while i like it, i'm getting kind of tired of it), so i have to plan for it. otherwise what would i have done with the turnips that were in last week's box, because we don't eat turnips on a regular basis. i have to plan for something to do with them.

so that is how i am doing on my new year's resolutions, so far. one of my other resolutions, to plant a garden, is coming along quite nicely and i will have pictures to share soon. i'm pretty excited about it. how are your new year's resolutions panning out?

Thursday, November 19, 2009

babyproofing

for some reason i am inordinately proud of these:


that's my soaping cabinet. it's next to my refrigerator in the kitchen, a lower cabinet. it contains all the soaping supplies i use on a regular basis - herbs, colorants, oils, soap scraps. tools that could hurt The Kiddo. glass bottles that could break. essential oils and fragrance oils that could be fatal if ingested. sodium hydroxide - LYE - that will destroy her skin if she touches it. we have latches for all our cabinet drawers and lower doors, but i wanted something sturdier for the soaping cabinet. something with a key.

those are just cabinet locks that i picked up in the latches section of home depot, the same area where you would find those little locks that go on window frames. they have a flat or offset piece in the back that swings across the cabinet frame, blocking the door, and they are pretty darn strong. the same kind of thing you'd find on a filing cabinet in your office. for some reason i was a bit put off by this project but decided to just dive in and do it, and it ended up being very simple. i traced the frame on the back of the door (so i knew where the frame hit the door) and then marked where i wanted the lock. i drilled a hole the size of the lock completely through the door, then diassembled the lock, fit it into the hole, and reassembled it in the hole. the concept is the same as installing a new door handle.

also, i should have checked but ended up completely lucking out - the locks are sold individually but the two i grabbed off the rack ended up taking the same key. the package does note on the back which key they use (ours was something like # 21233). i don't know why i didn't think to make sure when i bought them because it would have been a massive pain in the butt if i had to use one key to get into the left side and a different key to get into the right side.

cross-posted at baby stenz

Tuesday, November 10, 2009

diaper sprayer tutorial

it seems the new thing for me to learn these days is plumbing repairs. first the toilet in the upstairs bathroom was leaking. i discovered a huge puddle of water and it turned out that the connector that attaches the toilet supply line (the tube that runs from the water pipe in the wall to the toilet tank) was broken. for some reason this repair seemed awfully daunting at first, but it was simply a matter of picking up a new supply line ($6) from home depot, unscrewing the old one, and screwing the new one on.

my latest project was actually not a repair. i built myself a diaper sprayer! it was insanely easy, and i am so ridiculously proud of myself. we started tk on solids two weeks ago and her diapers have become a bit more solid as well. since she is in cloth diapers, we don't get to just throw away her mess and swooshing her soakers in the toilet bowl was just not working for me. a friend had suggested i could make my own very inexpensively. it cost me about $25 to make; apparently you can buy them for about twice the price and i'm thinking the only difference is that those might look a little more streamlined.


this one is from pottypail.com. it retails for $34 plus $6 s&h and you still have to do some assembly/installation. mine was cheaper and required minimal additional effort.

i actually did not use jaimey's instructions, i just could not understand them. sorry jaimey! the general idea is about the same though (i think) and there is a great video tutorial here. first, shut off the water at the main valve behind the toilet, and flush the toilet once or twice to drain the tank. then disconnect the supply line from the tank and the water pipe. you will need a flexible supply line to install your diaper sprayer; you might have to look for a toilet in your home that has a flexible line. i put ours in the upstairs bathroom closest to hannah's room.

you will need two 3/8" barb adapters; one 3/8" x 3/8" x 3/8" tee barb connector; five 1/4" - 5/8" hose clamps; one kitchen sprayer assembly; and one ball valve. the ball valve should be either 1/4" or 3/8", depending on the size of the threaded end (MIP) of the barb adapters. i got 1/4" because the 3/8" valve looked bulkier. also, you may want to measure your toilet supply line to be sure that you don't need a 1/2" tee barb connector, but apparently only about 5% of homes in america have 1/2" connectors.

you will also need a hacksaw or a small hand saw, a couple monkey wrenches or a set of crescent wrenches, a screwdriver for the hose clamps (usually flathead), and some teflon tape. you might also want a hook to hang the sprayer on the wall; i just used a large cup hook that i bent a bit more open with a pair of pliers. i thought about taking pictures while i was making this, but i was so excited to get it done that i just did it.

using a hacksaw, cut the supply line in half. cut the fitting end off the kitchen sprayer assembly as close as possible to the fitting (you want as much tubing as possible), and then cut the tubing again about six inches down from the spray nozzle. you will end up with a spray nozzle with a short bit of tubing attached, and a long piece of tubing with nothing on either end.

slide a loosened hose clamp onto one of the supply line pieces, then work one end of the tee barb into the hose. do the same for the other side of the supply line and tighten the clamps with the screwdriver.

wrap the threaded ends of the barb adapters with teflon tape, then slide a loosened hose clamp onto the tubing attached to the spray nozzle. work the barb end of one adapter into the tubing, then tighten the clamp. do the same for one end of the rest of the tubing, then slide a hose clamp onto the other end, work it onto the third end of the tee barb, and tighten the clamp.

screw one end of the ball valve onto one of the threaded ends of the barb adapters in the sprayer tubing and tighten with the wrenches. you will need two wrenches, one to hold the tubing and one to tighten the valve. do the same to connect the other end of the ball valve to the sprayer tubing.

now your assembly is complete and you just need to reinstall your jury-rigged supply line back onto the water line and the toilet tank.


turn the water back on a little and open the valve, then spray the sprayer. you will probably need to play with the valve to see how much water pressure you need to spray your diapers.

the purpose of the ball valve is to prevent constant water pressue on the kitchen sprayer. the sprayer is just plastic and i did not want anything in the sprayer to fail and cause a flood. when the red lever is sticking out, the valve is closed; i just line up the lever with the tubing to open the valve and "turn on" the sprayer.


you can see i just screwed that mug hook into the wall to hold the sprayer. apparently this is also good for rinsing kiddos while they are taking a bath, though the water is not heated so i don't see why you'd want to spray your kids with freezing cold water. personally i think this will also be awesome for spraying down the tub/shower when i'm cleaning it.

all total this project took me about twenty minutes from start to finish.

i know it isn't a huge thing, building and installing this sprayer, but if you would like to come to my house and marvel at my handiwork you're more than welcome to!!

update: i used it for the first time today and it works GREAT!! yay! also, i was thinking - this is a very easy thing to take with you if you move. just shut off the water to the toilet, take off the jury-rigged supply line/sprayer assembly, and reinstall a new (uncut) supply line. you could also easily install one in an apartment, just like you would your favorite showerhead.

Tuesday, November 3, 2009

still here.

it's been a busy month, and i keep meaning to post, and it's not that i don't have anything to post about, i just keep forgetting. i guess this is what happens when your plate is maybe a bit too full?

i made our halloween costumes this year which i generally do though i have not made any in a couple years, just recycled the old ones. i have a stash of stuff that can make a pirate wench, a princess, or a gypsy. this year we wanted to do family costumes so there was much discussion regarding what we were going to be. someone in our family is not very creative and kept shooting down all the creative ideas from someone else, who granted is not as clever as this girl. in the end the kiddo ended up being a pumpkin.


of course, after i had purchased the pumpkin costume for hannah, kerry suggested a bunch of cute things. like, brian could be a polar bear, and i could be a penguin, and hannah could be a fish. the food chain! she also suggested that brian and i could be some sort of insects and hannah could be a grub. MY BABY IS NOT A GRUB thank you very much. i thought it would be clever if hannah was a pumpkin, brian was a frog, and i was a witch, but no one else seemed to think that was as amusing as i did. in the end we were just a jack-o-family.


i was not in love with our costumes though i guess they turned out cute. brian said he looked gay in his costume even though he got to be the scary pumpkin. i used felt for everything and after much ribbing from my sister, gave up looking for a pattern and made up one myself. basically they are just pullovers that i copied from old tee shirts, lined with tulle and stuffed with fiberfill with an elastic casing at the bottom. this was also my first attempt at applique-ing anything and i'm happy with the way the faces turned out. i used wonder-under first, i don't know if that is how appliques are usually done but that is how i did it. after i fused the felt face pieces on i zigzagged the edges. i used my walking foot for these costumes and really, i don't know how i've lived my life without it. i use it for so many things now.

i realized too late that we should have dressed hannah up like this (costume borrowed from a friend for a photo):


and brian could have been a gorilla and i could have been a monkey. HANNAH BANANA!! my good ideas always come a day late.

we also had a huge storm a couple weeks ago, the first of the season. it was hugely rainy and impossibly windy and almost all of the trees around here still had their leaves, including the beautiful japanese maple that was in our front yard. (it actually looks rather pathetic in that picture, which must be insanely old too, because the tree was quite a bit bigger than that.) i came home from work that afternoon to find this:


of course, it didn't even touch the pathetic, ugly tree that is also in our front yard, in a strange spot way too close to the rosebushes. i would have been happy to lose that tree. my husband was a champ and cut up the tree into pieces and even dug out the stump, which left us with a giant hole in the yard, two weeks before halloween when tons of children ignore the walkway and tramp up our lawn.


lawsuit, begone!

i don't know what we will do now that halloween is over. probably fill in the hole with some turf builder on top, though there has been talk of putting a pumpkin in it for thanksgiving and a snowman for christmas and making it a theme hole. we are also those people who take their baby to a rock concert. don't you wish we could be YOUR neighbors?

i am now a sahm officially - i quit my job because half of my income was going right back out the door to daycare, which sucks. technically i was let go as my boss changed my quit into a discharge the week before my last day, which is technically legal but in my humble opinion kind of jerk-ish of him, so i'm glad to be out of there.

i have also been working like a crazy girl on the etsy shop. there is a ton of cool stuff up if i do say so myself, go check it out! i am still ridiculously excited about it, and i even made a couple custom halloween costumes. also, i am going to be a vendor! how exciting is that! it's a super-tiny event - mil is a legal secretary, and they always have a couple vendors at their local annual dinner, and she got me a table. there will only be around 30 people in attendance, but the table was free (no vendor fee), and i don't have to share a percentage of my sales, so anything i make from this is gravy. it's in two weeks, and i am ridiculously excited, and we will even have tee shirts, if i can get some iron-on transfer paper that actually works!

Sunday, May 3, 2009

nesting like nobody's business

and the nursery is FINALLY done! well, except for one piece of artwork, but that can certainly wait. i love her room:


this is what i did for my birthday: hung the shelf over her dresser, painted and assembled the shelves in her closet, set up the pack & play downstairs, and cooked like a madwoman. i also did laundry and some light cleaning, the usual weekend chores. my coworkers also took me out to lunch on friday and brian took me to lunch on saturday. we are both pretty beat lately, him from work and me from being pregnant, that neither one of us had the energy to make a big to-do for my birthday. i didn't really mind because of all those things that were nagging at me to get done before the kiddo arrives, and i'm generally happiest working on a project or six. thank heavens for this manic nesting energy or nothing would be done.

my freezer is also (i hope) fully stocked for the next few weeks. brian does not cook at all and while he can happily eat fast food and take-out for every meal, i would prefer something healthier and home-cooked. now in my freezer there are currently three turkey dinners (turkey, stuffing, mashed potatoes, gravy, and vegetables), six turkey pot pies, three bacon & leek quiches, two lasagnas (including a vegetarian one in case kiddo is here when my sister comes over), and one dish of stuffed shells. this is in addition to our usual assortment of chicken, ham, steak, fish, and frozen vegetables that i can pull out and thaw at a moment's notice. my mother told me that when i was born, she and my father ate from their freezer for six weeks. dad only had to go to the store for milk and lettuce. six weeks is a lot to live up to, i don't know if we will make it that far, but i'm trying. so now all brian has to do is take something out of the freezer in the morning, leave it to defrost, and stick it in the oven. i even wrote instructions on the labels.

i'm sure i could find more to do, but i think i'm going to go put my feet up with a good book or watch a movie. besides, brian is bringing me home a baskin robbins milkshake and i don't want to miss that.

cross-posted at baby stenz

Monday, April 20, 2009

wherein we work our butts off but have a lot to show for it

i must be seriously nesting because i've been quite productive lately. for starters, we got knobs for the dresser, YAY FINALLY OMG IT'S ABOUT TIME. brian drove me up a wall with these stupid knobs as he hated every single option i presented him with. in the end we decided to get plain wooden ones and paint them ourselves:


i love them so much. i love them even more on the dresser, which we hauled upstairs into her room. thank heavens it was very light with the drawers removed because we are quite a pair right now, me pregnant and brian with his bad back (he re-injured it last week).


it's the hemnes dresser from ikea, only custom-made shorter for us. the ikea one would be fine for brian but is too tall for me to use as a changing table. these are the things you have to think about when your husband is twelve inches taller than you are.

i also made a delicious easy dinner and dessert sunday evening. i try to make something a little special at least once on the weekend because i have the extra time. i am always trying to come up with something interesting to do with chicken breasts as they are usually pretty inexpensive, easy to freeze for later, and easy to bake on a weeknight. this weekend i found an easy baked chicken recipe, and it was quite delicious with roasted potato wedges:


there really is a chicken breast under all those onions, i promise.

baked chicken with onions, garlic, and rosemary

chicken breasts or parts
salt and pepper to taste
1½ onions per breast half (or equivalent weight in parts), sliced into rings
6 cloves garlic per breast half, thinly sliced
olive oil
2 tsp. fresh minced rosemary or 2 T. crumbled dried rosemary per breast half

preheat oven to 400°. rinse chicken and pat dry; season liberally with salt and pepper. toss together onions, garlic, and rosemary with a few drizzles of olive oil. spread half the onions across the bottom of a shallow baking pan large enough to fit all the chicken pieces in one layer. arrange chicken pieces on top of the onions and then cover chicken with the remaining onions. bake 45-55 minutes or until chicken tests done.

roasted potato wedges

red potatoes
olive oil
kosher salt
pepper
chopped fresh garlic
ground cumin

preheat oven to 400°. scrub potatoes and slice into wedges. toss together with olive oil and spices to taste. arrange on a baking sheet and bake 20 minutes or until golden brown.


and then we had strawberry-rhubarb pie for dessert. !!! i love springtime and i love rhubarb and i love pie, so when i saw rhubarb at the store on friday i HAD to get some.


according to joy of cooking, the juices are supposed to bubble through the lattice like that. i had never made a lattice top before and now i know why: because i am just as lazy of a cook as i am a seamstress. it looks pretty but that was more work than i care to do. i like pie so much because it is easy and delicious, and lattice on top just is not so easy. or maybe i am missing something? i made extra crust dough to freeze, because it is always nice to have homemade pie dough on hand for quiche or when i get the hankering for pie, and pie crust is so easy. and brian actually liked this pie! he is not very big on fruit desserts (if it doesn't have chocolate, what's the point?) so this was huge to me.

basic pie crust (makes 2 crusts)

2½ c. flour
1 tsp. sugar
1 tsp. salt
½ c. (½ stick) frozen shortening
½ c. (1 stick) cold butter
ice water

mix together dry ingredients. cut in shortening and butter with a pastry cutter, two knives, or short pulses in a food processor. continue cutting/pulsing while drizzling in a small amount of ice water, until dough just begins to stick together. gather into a ball, wrap in plastic wrap, and chill at least ½ hour before rolling out.

strawberry-rhubarb filling

2½ c. chopped rhubarb (pink or red stalks only)
2½ c. sliced strawberries
1 c. sugar
¼ c. cornstarch
¼ tsp. salt
2 T. butter

preheat oven to 450°. combine rhubarb, strawberries, sugar, cornstarch, and salt in a large bowl until fruit is well coated; let stand 15 minutes. pour into prepared pie crust and dot with butter; cover and vent. bake 30 minutes, then turn oven down to 350°, place a cookie tray under pie dish, and bake another 25-30 minutes or until top is golden brown and thick juices bubble up through vents.


oh, and i did this all on what was quite possibly the hottest day of the year thus far. what was i thinking? that pie was worth it, but.

Monday, April 6, 2009

maybe not such a bad plant mommy after all

i've been noticing my roses lately, the ones i don't know how to manage and as of yet have not really learned. i know you're supposed to hack them back prune them down in the winter, but my understanding is there is a particular way to do it so they will grow back healthy and beautiful. heck if i know what that particular way is, i just hacked away with the loppers. not that i ever remember to water them either. and yet the bushes in the backyard are suddenly thriving - one in particular is suddenly covered with lovely white flowers. the ones in the front yard have shot out tons of new growth and it seems like overnight they have become covered with buds. pictures to follow in a day or so when they explode, photographic proof that apparently even i can grow a rose without knowing what i'm doing.

the dianthus on the front porch, now that's another story.

Monday, March 23, 2009

now i can even make my own dirt

i went to a composting workshop sponsored by our city this weekend to learn how to compost. i was inordinately excited about this because i had halfheartedly tried composting before without any success. it's not terribly difficult but apparently there is a "right" way and a "wrong" way (or rather, a more efficient way) and i wasn't doing it "properly" which is why i was not having a lot of luck at it.

the workshop instructor called composting "nature's recycling program," because there are no landfills or recycling centers in nature to haul away the dead crap and waste. composting is just the process by which nature breaks down all the stuff it doesn't need anymore and transforms it into this nutrient-rich stuff called humus which is not soil but a very nice soil amendment. so it wouldn't be a great idea to fill my proposed raised beds (for my garden, i'm so coveting raised beds AHEM brian) 100% with compost, but mixed with other dirt it will be great.

compost needs four things: carbon materials, nitrogen materials, air, and water. carbon materials are "brown" things like dried leaves, newspaper, sawdust, coffee filters or tea bags, and dryer lint (!). nitrogen materials are "green" things like kitchen scraps, grass cuttings, coffee grinds, and fresh prunings. you need about a 3:1 ratio (50-50 at most) of brown things to green things. aha! my previous compost pile was mostly green things, which can make the pile kind of stinky and doesn't break down as quickly as if there were brown things in it. the instructor said to think of the green things as fire and the brown things as fuel: you can't have a really good fire without the right proportions of each, even though you might have a fire.

part of the composting workshop - and what really drew me in, i'll admit - was that every participant got a free composting bin and free compost. so there are two delicious bags of compost sitting in my garage (awaiting my raised beds, AHEM brian) and i set up my new free bin yesterday. i filled it first with some old trimmed branches (to create a nice airspace on the bottom), then with grass clippings, then shredded newspaper, and then watered it on top. the water helps sustain the decomposition process and has the nice side benefit of keeping the newspaper shreds from blowing away. then another layer of grass clippings, another layer of newspaper shreds, and a bit more water but not so much that the pile is soggy. i'll turn it (basically stir it up) every week or so and (supposedly) in a couple months i will have beautiful black compost for my raised beds! (AHEM brian)

again this was all sponsored by our city and i would bet it's not unique to us. another cool thing was that they subsidize the purchase of two fancier composting bins, this one for only $20 and this one for only $40. both have lids which would be wonderful for us as i do hoard kitchen scraps for our clean greens bin, but they can go in the compost pile. without a lid, i need to be careful to bury our kitchen scraps so we don't get rodents or yucky flies. i am coveting that bio-stack one.

you do not need a bin to compost; you can just do it in a pile in the yard. or you could make your own. be sure not to put "icky" things in it like pet droppings, diapers, or meat or bones; remember, you are (theoretically) using the compost to provide nutrients for your vegetable garden (AHEM brian), so you don't want that stuff in your food supply. more information about composting is here.

by the way, did you know that newspaper has a grain? this now makes sense to me - it's made from trees, and wood has a grain, so. if you tear your papers lengthwise, along the grain, they will tear into nice strips, but if you tear cross-wise they will just rip into chunks.

Monday, March 2, 2009

serious nesting issues

brian asked me the other day if i feel crazy or different or anything (anything that could help him, please!) when i go all hormonal off on him, and i don't. i feel perfectly rational and justified and MY HUSBAND IS JUST BEING A JERK it's so not me and has nothing to do with the 18 additional pounds i'm carrying or the demonically high levels of radioactive hormones coursing through my veins. honestly, i do feel perfectly normal, except for this raging nesting instinct that has been rearing its head for the last month or so, and oh Lord we have another TWO MONTHS of this?

that nesting instinct has manifested itself in the nursery, where i have been sewing insanely for the kiddo and doing what i can to prepare for her arrival. i know i have lots of time still, but who am i to fight the hormones and body chemistry that God has blessed me with? ergo, we bought a crib and i promptly had to make bedding for it:


not only the quilt but the other linens as well. it all kind of snowballs, doesn't it? then the rocker (that mil rocked brian in as a baby) needed a pillow, for back support. and the underside of the crib was just plain ugly to me and needed a skirt, though i hate skirts. then i was not thrilled with the pink sheet over the mattress. and then, and then, and then.

the name on the wall, that was all brian, by the way.

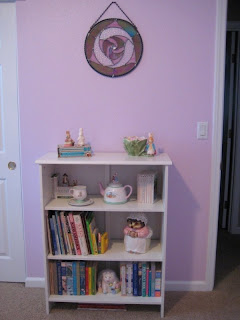
we also got an inexpensive bookcase which i felt the room really needed to balance the crib and rocker (and the soon-to-be dresser). i really wanted this one but apparently it is discontinued IT DOES NOT SAY THAT ANYWHERE and unavailable. the other one does not actually look as awful as it does online:


most of those books are from my childhood though some are from brian's and some are from when i was tutoring in college. and the pregnancy books. the beatrix potter breakables go up on shelves once the dresser gets here and we are able to hang shelves. mostly this stuff was all on the floor and it helped my hormones to get it up off the floor, organized, some semblance of put away. i will be so much better once the dresser arrives and i can get to work organizing the crap that is currently in boxes and bags in the closet, and then i can kit out the closet with shelves, hooray!

cross-posted at baby stenz

Monday, February 9, 2009

nursery and the quilt (part 1 of... ?)

latest project: a baby quilt for the nursery. we painted the nursery last weekend in behr's rose glow, a kind of pinkish lavender. it changes color depending on the light and sometimes looks pink and sometimes looks lavender. we are not in love with it, mostly i think because it was a compromise color. brian wanted a brighter lavender and i wanted a softer, lighter peachy pink. it is also a color that i think neither of us would ever in a million years choose for our house under normal circumstances. it is starting to grow on me though.

we got a crib this weekend, this pretty white one. i love it. the white makes the paint a lot more bearable. we are also going to get this dresser from ikea. we actually already have it in our bedroom in the antique stain and love it, and it is a nice height to use also as a changing surface. i also really want a small white bookcase. the rocker that brian was rocked in as a baby is already in there.

i tidied up in the nursery, tried to make it look a little less "un-done," tossed my old yellow baby quilt over the crib for an accent. suddenly i liked the nursery a lot more with the lavender and yellow together. we have been struggling to find a "theme" for the nursery and i think those colors together with the white will be very pretty. i was inspired to make a quilt to start us off and so we ran out to the fabric store to pick something out.

this is what we ended up with:


the white and the yellow actually have very subtle prints, the yellow is has a soft basketweave on it and the white is actually a white-on-white scroll-y print. very pretty. brian chose the purple butterflies and though it is bright against all that white and yellow, i really like it.

i know that one square looks a bit wonky, i remembered last night why i don't often quilt. in fact i have done very little piecing in my entire life because i hate it. piecing gives me a stomachache. (piecing refers to putting together the top of the quilt; quilting is the actual putting-together of the quilt and stitching through all the layers of fabric and batting.) i hate cutting out all those tiny squares and triangles and whatnot. i hate stitching them all together. i hate that i do all this sewing and pressing all those seams and have virtually nothing to show for it. it feels like i do all this work and never make any progress. it drives me crazy.

on the plus side, this one is much smaller than the two "quilts" i have done previously (actually duvets, so i just pieced the tops and did not actually quilt them). they were both king-size which is a bit daunting let me tell you. the first one i did in a log cabin pattern which imho turned out really pretty but was a lot of work for a quilt that size. my pieces were very small and it just took forever to make each square, and i think i had to make 64 squares. the second was a very simple pattern of 3 lines of contrasting fabrics alternating with large solid blocks, i'm sure there is a name for the pattern but i have no idea what it might be. that was a lot easier because the squares were so much larger. this baby quilt is crib-size (45" x 60") and those pinwheel blocks will be alternated with solid yellow blocks, kind of like a double nine-patch, which means i only have to make 12 of them. like my second quilt top, i'm sure that pinwheel pattern has a name, i just don't know it. i drew it up on my own but there is nothing new under the sun and i can't believe that it's completely original. i haven't decided yet how i want to border this one.

we'll see how it comes along. i really like the double nine-patch pattern and i have more than enough fabric, 2 yards of each, so i could possibly stop here and start over with the nine-patch squares. i might do some blocks in the pinwheel and some in this neat disappearing nine-patch. i might do all three. i might do a "sampler" with 12 or 24 different patterns, one in each block. i might tear all my hair out and just do a large basic block quilt. i might end up in a mental institution from all that piecing, wheeee!!!

Tuesday, January 27, 2009

pretty and functional, right up my alley.

this was also a small project this weekend that i have been meaning to do. this creative idea was stolen from my mother:


i like it because it is crafty and functional without looking like some nifty crafty organizer thingy you'd buy at a holiday bazaar and pawn off on some unsuspecting b-list relative. i also like it because it makes my everyday things like artwork. brian actually even liked it, a lot i presume, because he kept commenting on it. or maybe he just liked that we finally have something (anything!) hung on a wall in our master bedroom.

it took about a half an hour to complete and no swearing at all which is my kind of project. i used the glass in a frame i had as a template to cut a rectangle from a piece of canvas, about 2-3 inches larger all around than the glass. i sewed on five random shank buttons from the button jar all in a row. they are about 1½-2 inches apart and kind of large-ish in diameter, and you need the shank so there is some depth for the chains. then i ran a length of heavy-duty thread across the back from one side to another in a kind of Z pattern, pulling the canvas really tight around the glass so it would not shift. i was not so concerned about the sides but i didn't want the top to wrinkle funny and maybe drape from the weight of the necklaces. then i just reassembled the frame and hung it on the wall by my dresser and voila, we finally have something mildly decorative.

Monday, January 26, 2009

condensed, sadly (but nicely streamlined)

the big project around the house this weekend was moving my sewing room downstairs along with all the assorted sewing/crafty crap i have collected over the years. this meant the downstairs closet had to get cleaned out, which was good because it was just storage for a bunch of stuff that did not need to be stored in the house. um, luggage? my upstairs closet also had to get cleaned out which was good because there was a lot of stuff that i just had not dealt with since we moved in six months ago. including stuff that just got thrown into boxes that really ought to have been thrown in the trash but just seemed vitally important at the time. and a bunch of brian's stuff that mysteriously migrated from the museum, how did that happen?

this is what i ended up with, sharing space with the guest room, which really feels a lot better now that the huge dark bookcase is out of there (the books went upstairs onto the ledge in our bedroom) and the futon looks like a real bed:


small notions in the top two drawers which previously housed random scrapbooking crap that now has a new home. isn't it nice to clean stuff out? the bottom drawer is scrapbooking paper, and the boxes behind are my sewing box (random stuff like the cams for the elna, extra knife blades for the serger, the buttonholer that i haven't figured out how to use yet) and two boxes of scrapbooking stuff. on the shelf is the cd box i repurposed years ago to hold my working patterns (those currently in rotation), a box of zippers and a box of elastic/velcro/bias tape, tailor's ham and seam roll, and the "reference" books and magazines i've collected over the years pertaining to my various hobbies obsessions. the small corkboard is a must for keeping pattern instructions handy while sewing a new project.

the shelf i repurposed from our old entertainment center that was in the original sewing room. i was going to hang both shelves but at the moment i like the spare-ness of just one, and (i think) i have enough space with just the one. hopefully it will also force me to keep things neat and tidy. this room also gets great light during the day but like all our bedrooms the overhead lights are crappy and dull at night. hence the torch lamp with the reading light which was previously down here and stayed, because i tend to like to sew at night when it is quiet. the ironing board will come down here also in the next day or so but i think i am going to have to get another over-the-door board for our bedroom/clothes ironing. we'll see how all the tromping up and down the stairs works out or if i can be counted on to pull the ironing out of the clean clothes basket before it goes upstairs.

still not sure if i am going to bring the knitting basket down or leave it upstairs in our room and i still have to re-hang the pictures i took down while we were moving stuff around. even with bare walls the room just feels good. even though it is smaller than my previous beloved space i am somewhat excited to get to work on a project in there. i think it is because the drawers under the table will make it so much easier to sew and scrapbook, because the little stuffs are not hidden in my sewing box or in the closet but usefully, easily within reach. the biggest thing i lost is large space to cut out patterns, but really, i can do that on the island in the kitchen or on my table if i move the machines.

in other news, rather coveting this cd from fiction family. nickel creek plus switchfoot equals beautiful. i wonder if i have enough change saved for a new cd?

Tuesday, January 20, 2009

afternoon project: upcycling

turned my childhood twin comforter into a comforter/bedspread for our full-size guest futon:


all it took was two king-size flat sheets (purchased on sale by my lovely hubby) and a package of batting, 45"x60". it's basically a duvet with large (14") flaps on the sides, batting in the flaps to make it comfy and warm. it was either this or store/donate the twin and buy a larger comforter, and this was cheaper. i'm inordinately thrilled with how it turned out, i almost want to sleep in the guest bedroom just because of it.

in other news, lots of swearing when it came to using my serger. as usual. i have a pfaff hobbylock 797, a 5-spool serger. we just haven't bonded yet, after three years. granted, two of those three years it lived in my closet because i couldn't figure out how to thread it, but still. that seems like not bonding to me. currently my problem is getting the machine to sew a 5-thread safety seam (3-thread overlock with a running stitch seam) without the left needle breaking against the presser foot. seems the presser foot wants to slip around, but everything seems tight as can be. right now i'm using a 4-thread overlock which is nice, but isn't the point of a 5-spool (versus four) serger that i can do that 5-thread seam? and i can't. any tips would be appreciated.

Monday, December 1, 2008

christmas cheer

we decorated the house this weekend but we still have to put up the lights outside. this will be a new experience for us as brian never did it as a kid and my dad always did it when i was a kid. nor have we ever had a home together where we could put up outside lights.

i really like these candy canes in our front yard. they were a housewarming gift from a coworker and i think they are very fun and cute.


this candelabra centerpiece was also a housewarming gift. it looks warm and cozy when the candles are lit.


i usually dread dragging out all the christmas decorations and i resist until after thanksgiving. if brian had his way, we would have had decorations up three weeks ago, which to me is just wrong. i always forget how much i enjoy decorating until i actually start opening the christmas boxes and finding the things that i love. it's like christmas early.

we have a fake tree which i detest on the grounds of traditionalism (real trees are how it should always be) but love because i am a cheapskate and it means we don't have to spend money on a tree every year. every year we vow to throw it out or goodwill the fake tree, and every year we put it back in the box because we can't bear to part with a perfectly good tree and spend more money next year. this year we threw away the cardboard box that it gets stored in, because it was falling apart. maybe that means we will get a new tree (or a real one) next year. we said it was because the box was dying so we would pack it into plastic bins like the rest of the christmas stuff.

i really hate putting lights on the tree. i try my best every year to wind them properly so they don't get tangled and every year they do, which inevitably leads to fights and headaches and general aggravation. along with getting rid of the current fake tree, every year i swear that if we have to have a fake tree, next year we are getting a pre-lit one. brian thinks stringing lights is half the fun but he always ends up pissed off too, so i'm not sure how much fun it really is to him.

we usually end up getting new garland each year because that stuff is so cheap and just falls apart at the end of the season. i could happily do without garland at all and brian would love to have so much garland that no tree shows through. i don't know where he thinks he would hang the ornaments then.

this year our tree might have a bit of an identity crisis because brian bought blue garland and we had some white and silver leftover from last year. is it hannukah or christmas? i think it is not sure. good thing it is a fake tree with no feelings. i really like my light-up star for the top. i just wish it was blinky and twinkly, but at least it lights up, which makes me happy.


the best part about unpacking the mountains of christmas crap and rediscovering the decorations i love is unpacking and rediscovering the ornaments. my favorite one is front and center, just below the star, where she always goes. that little stuffed angel is from my parents when i was 5 and i have always loved her the best of anything. some of the most special ones don't go on the tree anymore, like the dough ornaments my mother made when i was 4 or 5 that are now starting to disintegrate. otherwise it's fun to find them again. here is the one kerry gave us for christmas the first year we were married, from kazakhstan. here is the one we got on our honeymoon. here is the one we picked up last year in ireland, and the stuffed napoleon brian was so thrilled to find when we went to paris last year. the clay hearts i made when i was little and the gold family ornaments from brian's childhood, including grandpa's (who died in 1997). also every year bonnie gets brian that year's collector ornament from the giants and the 49ers so we have a lot of sports-themed ornaments. every year i threaten to get brian a 3-foot tree and orange halloween lights, so we can have a tree specifically dedicated to the giants. he complains but i think he secretly likes the idea and i think it would look pretty neat.

we also went to the christmas parade in old town on saturday night. it was colder than i expected and i wished i had brought a scarf. we were looking for the neighbor girls who were marching in the parade but couldn't find them which was disappointing.


there were a lot of classic cars all lit up and we really liked that. brian and i really love classic cars. three of the local high schools also had their marching bands and color guards in the parade, and there were a lot of girl and boy scout troops. when i was in elementary school my girl scout troop marched in the escondido christmas parade a couple times, but i remember it being in the daytime and hot and i didn't like carrying the banner. maybe i am remembering the wrong parade. anyway, this parade was fun and hometown-y and i rather hope it gets to be a tradition.

Wednesday, November 26, 2008

weekend warriors

for our housewarming gift, my lovely father made us a box/bench for our new spa. i had originally requested a step so i could get in and out of the spa easily and safely, as i have short legs and brian did not get a step when he got the spa. dad said he'd do one better and make us a bench with storage underneath. he delivered it last week and all we had to do was stain and varnish it (he couldn't match the color without us, so we did it). my mom made the weatherproof cushion on top.


i think it is beautiful and it is currently storing some lawn seed and the spa chemicals and there is a ton of space for us to fill up still. brian was disappointed that the color we chose does not match the spa perfectly (too dark) but i just wanted it to blend and i think it looks great.

did you know home depot custom-blends wood stain just like they do paint? maybe you did, but i didn't. finding the stain was a challenge in and of itself. i wanted individual stain samples (little ketchup-size packets) that i had gotten before, so we could test a couple different colors to find the right one. i couldn't find them here in our town and i didn't feel like searching too hard so i got the spa access panel and took it with me to ace hardware to match the stain. then it turned out i got the wrong kind and ace did not carry the correct one, so i had to go back to home depot. personally i hate the paint counter at our home depot, because they only have one computer to put in your order and there is this old guy that always takes his sweet time no matter how long the line is.

when we went to home depot the first time we also got stuff to put up a storage shelf in the garage. i had been talking about doing this for a few weeks now and brian seemed to be all on board - and then at the last minute (literally, as we were walking out the door to go to home depot) he decided he didn't want a shelf in the garage. he finally relented and up the shelf went.


i would like it to be longer, like 24' (it is 16' right now), but we can extend it later. for now it gets a bunch of stuff up off the floor that we don't use on any kind of regular basis (but unfortunately do use often enough to warrant keeping). as a treat for brian, i cleaned up the garage and the ping pong table so he can play ping pong this weekend when mil comes over. maybe that way he will forgive me for that "awful" shelf.

Sunday, October 12, 2008

entrez-vous

with the housewarming party upon us (next weekend) we decided it was high time we got around to finishing up some of those decorating things around the house that we've been meaning to do. one of those things was finding a console table and mirror to define our entryway since it is part of the living/dining rooms and rather open instead of a clearly defined space (which i would have preferred, but you can't have everything). we found this lovely table which happened to match our dining table almost exactly, and then i fell in love with this random mirror:


it's a fish. stood on end (that was the way the hangers were). how odd is that? the more i looked at it, the more it grew on me, and i was able to talk brian into it. i don't know if he is as entranced with it as i am, but i love it. it's interesting.

Wednesday, October 8, 2008

when is a bathroom more than a bathroom?

when you decorate it up to feel blissful!

well, maybe blissful is stretching it a bit, since these are the two small bathrooms in our house. (we have yet to figure out what to do with our master.) but i wanted them to be pretty places, a room that feels good to be in instead of just functional. i was craving a ledge for the upstairs bathroom, for the nook above the toilet in the water closet:


and tried to create a "natural garden" feel with the green linen shower curtain, green candles, and framed cutting (from our front yard!). you can't see it, but on the facing wall i found a pretty clock with flowered grasses embedded in it. there's other framed cuttings and an orchid in the outer wash area.

then brian complained that the upstairs bathroom looked so nice and i didn't do anything with the downstairs guest bathroom, so i got another ledge. i love ledges. they are such an easy design element. just pop it on the wall and arrange a couple items on it and instant style:


a fancy framed greeting card, a shell and coral from our honeymoon, a candle, and a seashell clock for a beachy, "vacation" feel. i think the shell and candle need to be a bit taller, but they were laying around the house and they'll do for now. hopefully guests will feel like they are on vacation and can relax and come back to visit more often!